Create FTP Site in IIS in Windows 8

No so long ago I decided to create FTP site for my home local area network. I wanted to read and write files not via file sharing but via File Transfer Protocol (FTP). I had Windows 8 Home Edition on my PC. So this PC became server for my FTP site.
To create FTP site you need to add Internet Information Services (IIS) to your Windows.
Go to Control Panel -> Programs and open link "Turn Windows Features on or off"
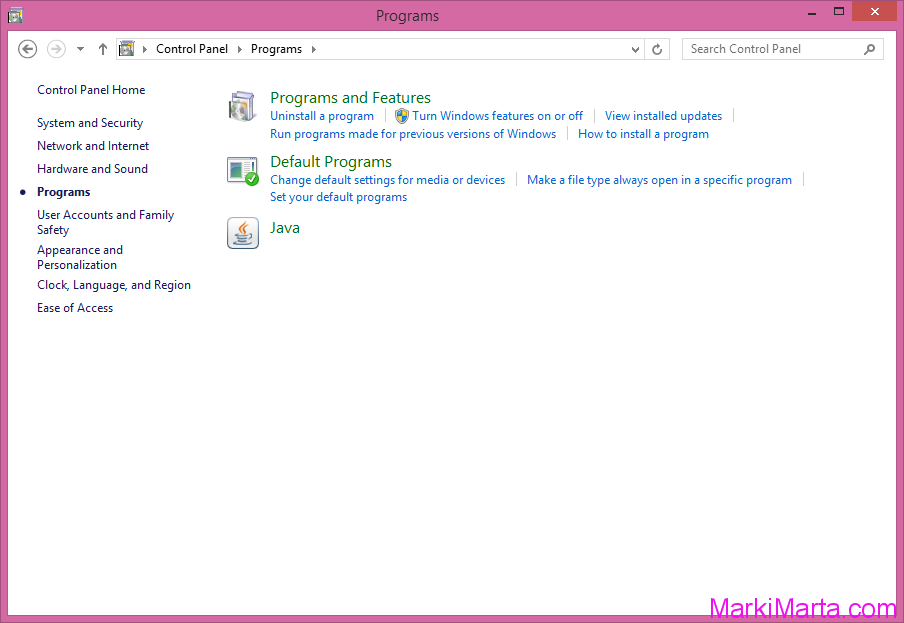
Figure 1. Control Panel
In the tree of items in the popup window find leaf "Internet Information services", open it, check items FTP Extensibility and FTP Service. I advice you too select all items in IIS. Press Ok.
Figure 2. Add FTP Extension for IIS
Windows will look for selected components and install them
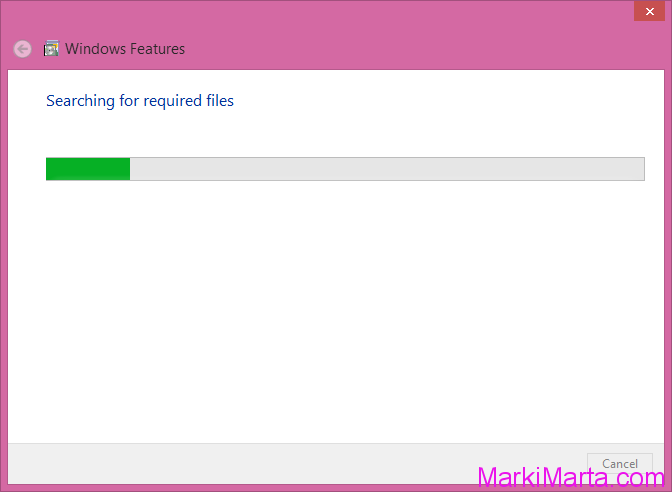
Figure 3. Searching for necessary files
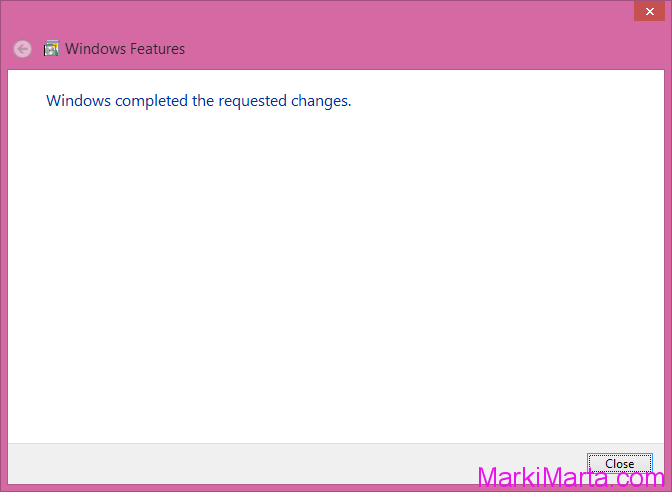
Figure 4. Adding extensions completed
Now we have installed IIS with FTP extension. Open it (see Figure 5).
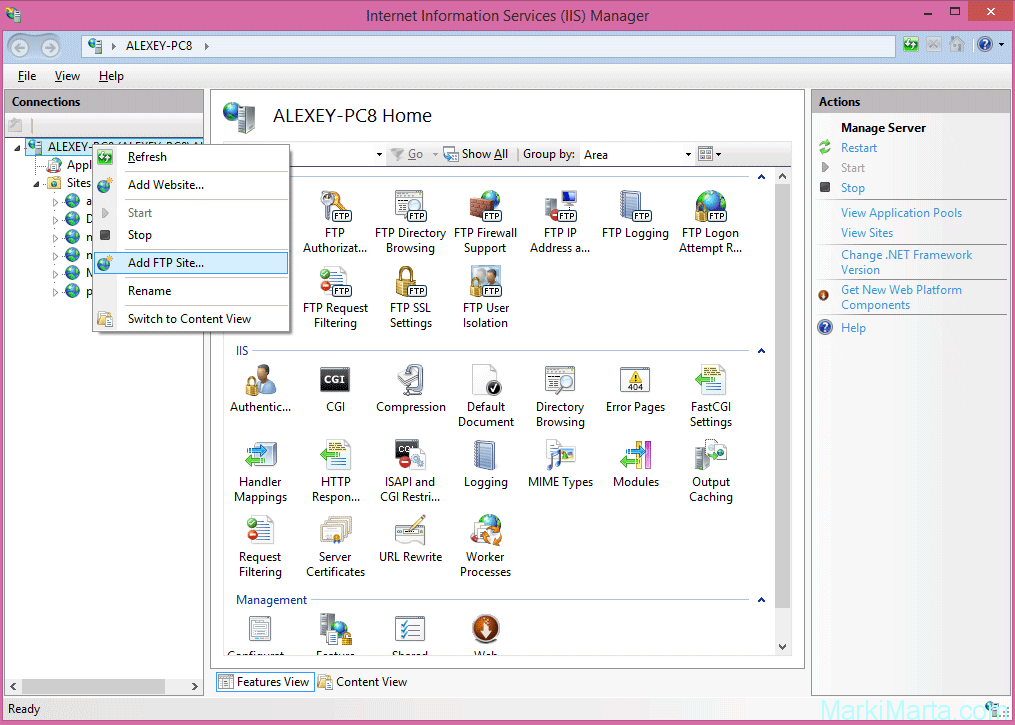
Figure 5. IIS window
Right click on "Sites" in the left side and press "Add FTP Site". Choose a name for the site and directory for site. If you have more than one disk, you’d better choose non-system disk.
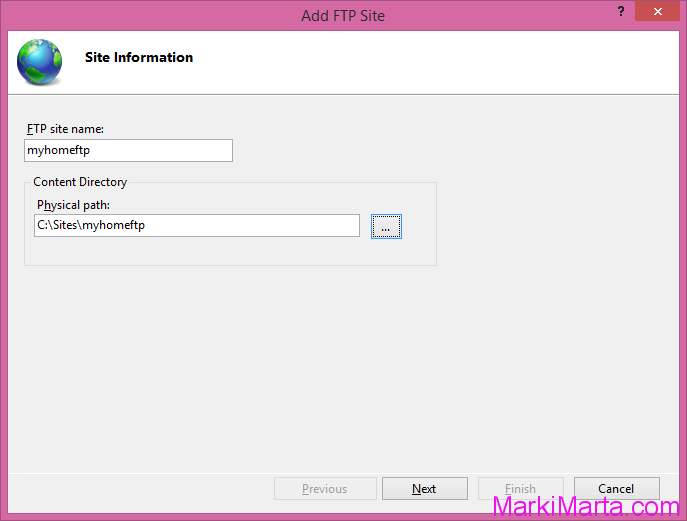
Figure 6. Name and physical path of FTP site
On the next page the field "IP Address" is "All Unassigned" and for SSL choose "No SSL".
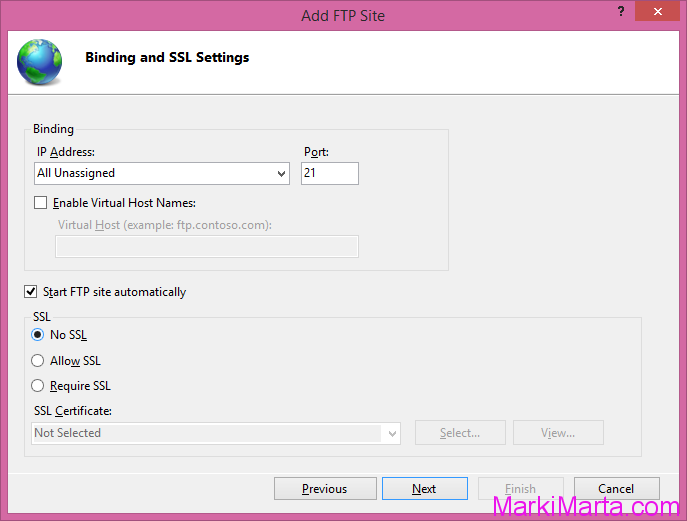
Figure 7. Set anonymous authentication
Press Next and set parameters for Authentication. There are only two kinds of authentication – anonymous and basic. In my case I decided to use Anonymous authentication. But if you set Basic, you can select users who can connect to your FTP site. Set permissions Read and Write and press button Finish. Before setting permissions, button Finish is inactive.
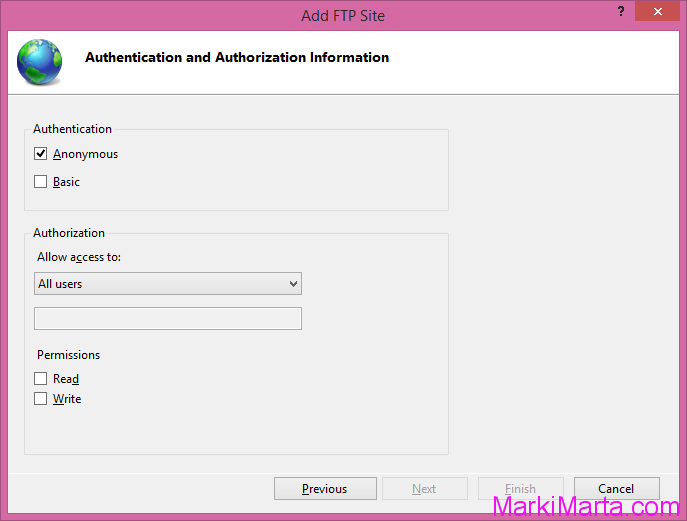
Figure 8. Authentication parameters
 Run Visual Studio as administrator for SharePoint development